
Rust on STM32F7 processor
In this post we will go through the steps necessary to install and configure a Rust cross-compilation environment from Windows to the STM32F7 microprocessor on a Nucleo-144 board. The goal is to create and deploy the “Hello World” of the embedded software world, a blinking LED.
Rust target
The first step to compile Rust code for the STM32F7 processor is to install the target for the rust compiler. This can be done using rustup on the stable channel by running the command:
rustup add target thumbv7em-none-eabi
Note: On many tutorials available online, it is written that the nightly channel is needed and/or that an additional external linker is necessary. If you have the latest version (as of the date of writing) of rustup none of these is necessary since the target is available on stable and the LLD LLVM linker is used.
The Blinky software
Programming microprocessors is generally about accessing registers and memory maps and to generate the final software the linker typically needs to be provided with a mapping file to determine where in memory should the different parts of the code be placed. The Rust community has done a very good job in providing crates that ease all this work so, before looking into the actual code, we will describe the setup to get the crates and memory mapping right.
Crate dependencies, cargo configuration and memory mapping
Starting from an app folder created by cargo, the first step is to add 3 crates to the Cargo.toml file: cortex-m, cortex-m-rt and stm32f7. These crates provide a run time, access to the processor registers and some assembly convenience functions. This is how the cargo file dependencies looks like:
[dependencies]
cortex-m = "0.6.1"

[dependencies.stm32f7]
version = "0.8.0"
features = ["stm32f7x6", "rt"]

[dependencies.cortex-m-rt]
version = "0.6.10"
features = ["device"]
Note that on the cortex-m-rt crate, the “device” feature is enable since the information for the specific device is created by the stm32f7 crate using the “rt” feature. The runtime crate provides the memory mapping files needed by the linker except regarding the memory size. To be able to link existing code, a new file called memory.x needs to be created at the top level folder. This file should have the following content:
MEMORY
{
  FLASH (rx) : ORIGIN = 0x08000000, LENGTH = 1024K
  RAM (xrw)  : ORIGIN = 0x20000000, LENGTH = 320K
}

_stack_start = ORIGIN(RAM) + LENGTH(RAM);
To enable the correct target building and linking, create a .cargo folder and a config file with these lines:
[target.thumbv7em-none-eabi]
rustflags = ["-C", "link-arg=-Tlink.x"]

[build]
target = "thumbv7em-none-eabi"
The first two lines, tell the linker to use the link.x file as the memory map. This file has a reference to the memory.x we created before. The last two lines are just a convenience to select the correct target when running cargo build.
Main function
Now that everything is in place to generate code for the STM32F746 we can get to the actual software. For this project there is only the main.rs file which looks like this:
#![no_main]
#![no_std]
extern crate cortex_m;
extern crate cortex_m_rt as runtime;
extern crate stm32f7;

use core::panic::PanicInfo;
use stm32f7::stm32f7x6::Peripherals;
use cortex_m::asm;

#[no_mangle]
fn main() -> ! {
    let per = Peripherals::take().unwrap();

    // Enable the clock for GPIOB
    per.RCC.ahb1enr.write(|w| w.gpioben().bit(true));

    // Configure pin as output
    per.GPIOB.moder.write(|w| w.moder7().bits(0b01));

    // can't return so we go into an infinite loop here
    loop {
        // Toggle the LED output
        per.GPIOB.odr.modify(|r,w| w.odr7().bit(r.odr7().bit_is_clear()));

        for _i in 0..100000 {
             asm::nop()
        }
    }
}

#[panic_handler]
fn panic(_panic: &PanicInfo<'_>) -> ! {
    loop {}
}
There are a few important things that make the code work. First of all, the top two lines
#![no_main]
#![no_std]
tell the rust compiler that we are writing a software without a main function (in the classical sense) and without std library, which is not available out-of-the-box for this target. Nonetheless, the runtime defines a default entry point for the software as fn main() -> ! so we can create this function as
#[no_mangle]
fn main() -> ! {
    ...
}
with the #[no_mangle] tag to ensure that the function name can be referenced by the linker. The last important part is to define the behavior of the system when a panic! occurs so we create the handler
#[panic_handler]
fn panic(_panic: &PanicInfo<'_>) -> ! {
    loop {}
}
which will basically get the processor “stuck” in an infinite loop. We will not cover the main function implementation details which make the LED blink but here is a very good blog post which covers the Peripherals interface in more detail.
Now we can run cargo build --release on the command line and get the software to run on our board.
Deployment
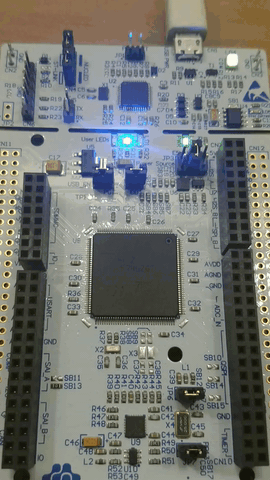
Once we get a compiled file we need to deploy it on the target board. For this example we are using the STM32 ST-LINK Utility. This application flashes binaries, whereas the output of cargo build is an ELF file. To make the conversion we will be using the GNU Embedded Toolchain from ARM . To convert the ELF file to binary run arm-none-eabi-objcopy.exe --output-target binary .\target\thumbv7em-none-eabi\release\blinky blinky.bin from the Powershell. From the Graphical Interface of the ST-LINK Utility, chose Target>Program&Verify and select the newly created blinky.bin file to flash. If everything went well you should now see an LED blinking.
if you are interested, you can get all the files for this project on the github page.